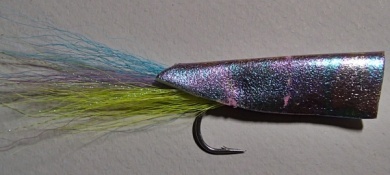
This is how I tye a Joe Blados Crease Fly. Joe is an artist, a welder and he always told me a Crease Fly it's like building a fly not tying. This is a top water fly not a real popper, it will pop given enough pull but after a time the face will rip apart, it's really a surface fly that looks l View more...This is how I tye a Joe Blados Crease Fly. Joe is an artist, a welder and he always told me a Crease Fly it's like building a fly not tying. This is a top water fly not a real popper, it will pop given enough pull but after a time the face will rip apart, it's really a surface fly that looks like a wounded bait fish. Remember to cut some bodies out of paper first until you get the desired shape. It works in fresh and saltwater, good to swim at night and fun to make....so lets get started.
Move the mouse over the image to zoom in the fly.
Touch the image to zoom in the fly.

List of materials
Hook: Mustad CK74S SS 1/0 or any long shank hook.Tail: Bucktail and Crystal Flash or FlashabouBody: White Fun Foam (a thin foam bought at craft stores)Eyes: Stick on holographic large size.Color: Markers are the best and can do a great job. Or, use Jones Tones transfer foilAdhesives: CA (Cyanoacrylate or Crazy Glue), Kicker (this sets the CA off) and for the foil 3M Super 77. Epoxy View more...Hook: Mustad CK74S SS 1/0 or any long shank hook.Tail: Bucktail and Crystal Flash or FlashabouBody: White Fun Foam (a thin foam bought at craft stores)Eyes: Stick on holographic large size.Color: Markers are the best and can do a great job. Or, use Jones Tones transfer foilAdhesives: CA (Cyanoacrylate or Crazy Glue), Kicker (this sets the CA off) and for the foil 3M Super 77. Epoxy
Steps
Step 1
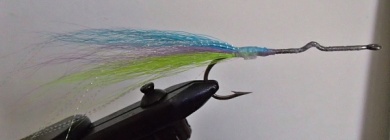
Here is the ONLY tying you'll do on this fly, at the tail tye in bucktail and flash. Make sure you cover the hook shank with thread and then CA the whole thing and spray it with kicker. Safety note: this is a chemical reaction that produces heat, the CA will harden almost immediately.
Step 2
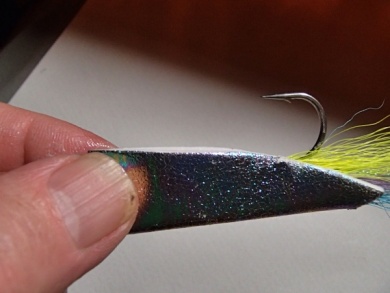
Next cut your body out of the Fun Foam. Lay the hook in the body along the bottom edge, there is no tying on the body it's all CA from here on in that is why you have to cover the hook with thread.
Step 3
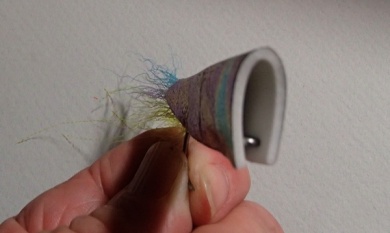
Pinch the the tail tightly and put a drop of CA to tack it down, the left over kicker usually is enough to make it work but you can take a bodkin and put a drop of kicker there and pinch it tightly.Now you have to hold the front end tightly and take the CA put a larger drop by the tacked down spot from a bodkin and then squeeze the drop towards the front making the bead run to the hook eye. Again kicker will hold it if you used enough but a bodkin dipped in a puddle of kicker will do the job wit View more...Pinch the the tail tightly and put a drop of CA to tack it down, the left over kicker usually is enough to make it work but you can take a bodkin and put a drop of kicker there and pinch it tightly.Now you have to hold the front end tightly and take the CA put a larger drop by the tacked down spot from a bodkin and then squeeze the drop towards the front making the bead run to the hook eye. Again kicker will hold it if you used enough but a bodkin dipped in a puddle of kicker will do the job with a quick swipe. Don't worry if the bottom is not perfectly straight, the fish could care less. The above picture shows the little valley you'll be closing with this step.I like to have the hook eye inside the mouth so my body is longer than needed and I cut to size.
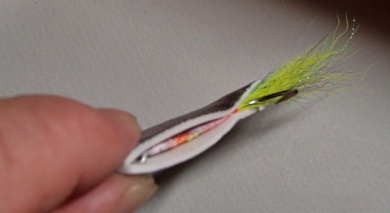
Step 4
Now pinch the tail very very tight and put a few drops down the inside of the body along the hook, this will weld the body to the shank after a shot of kicker. Caution!!! don't look in the body as the CA may spit out in your face after the kicker! Next put in some scrap foam to make more durable or drop in a rattle which really adds to this fly.
Step 5
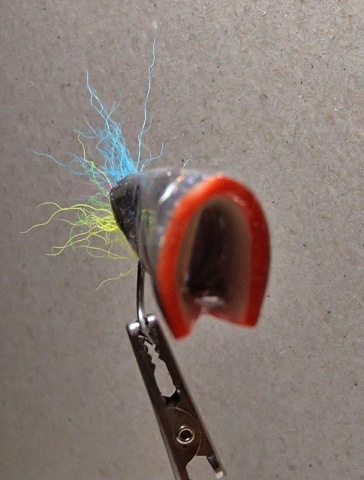
Here is the fly with some added foam and a plug of scrap foam slid in to add to it's durability.......put a drop of CA in the mouth and roll it around the edges of the plug to hold it in place.
Step 6
This is what the fly looks like just before it will be finished. Notice how there is a hook gap from the body for a good hook set. I've taken some lavender marker to cover the open spots in the foiled body. I like plain white Fun Foam and markers, they add more of an artistic or personal touch to the fly.
Step 7
Add a big holographic stick on eye, take a red pen to draw on a gill slit and then brush on a thin coat of epoxy. Let dry and add another thin coat of epoxy for some extra durability. Remember to make this fly act like a bait fish that is wounded, sick or just out for a swim. I like to give it a couple pulls, stop, twitch it twice, then stop and then a two pulls. Usually after the second twitch it's hammered.Now this fly takes some practice but once you get the buil View more...Add a big holographic stick on eye, take a red pen to draw on a gill slit and then brush on a thin coat of epoxy. Let dry and add another thin coat of epoxy for some extra durability. Remember to make this fly act like a bait fish that is wounded, sick or just out for a swim. I like to give it a couple pulls, stop, twitch it twice, then stop and then a two pulls. Usually after the second twitch it's hammered.Now this fly takes some practice but once you get the build down and your body shape to your liking they it goes quickly. If you need a pattern to help get you started send me a message and we will work it out.
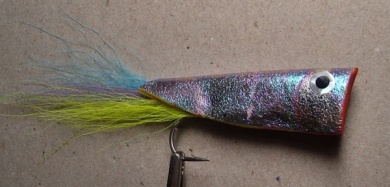
Step 8
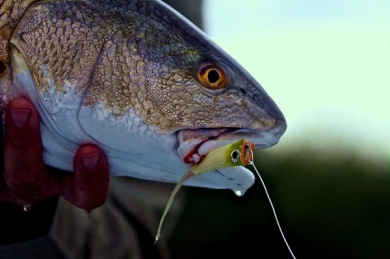
Here is a plain white and chartreuse Crease Fly with a rattle in the body and in the mouth of a nice redfish. Tight Lines

