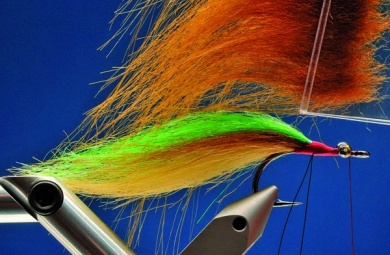
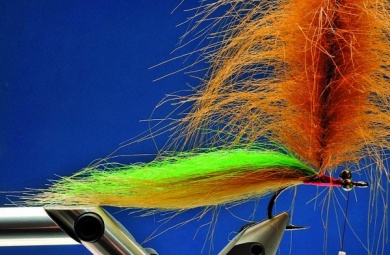
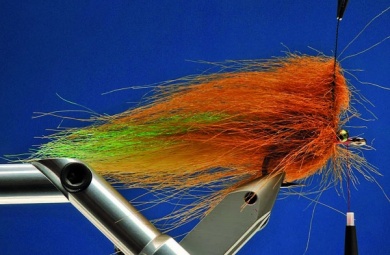
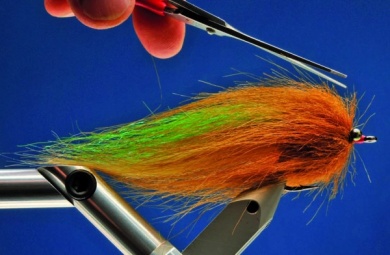
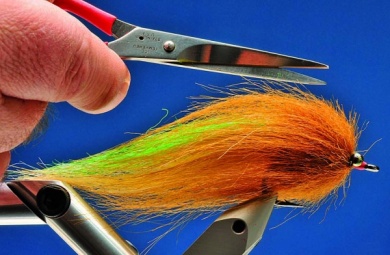
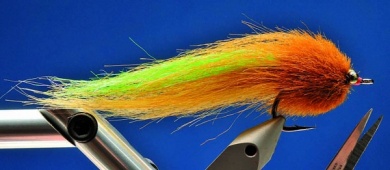
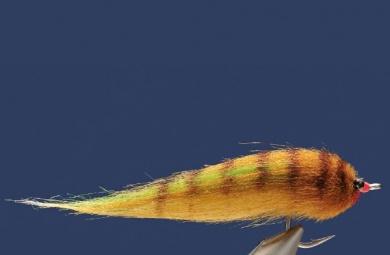
The idea was to design a different fly for tarpon. I wanted the shape of the body and the way it pushed water to be related with the pressure waves generated by the fish tarpon prey on. I also wanted it to move naturally when stripped. I decided to use some concepts that have proven high effectiven View more...The idea was to design a different fly for tarpon. I wanted the shape of the body and the way it pushed water to be related with the pressure waves generated by the fish tarpon prey on. I also wanted it to move naturally when stripped. I decided to use some concepts that have proven high effectiveness in golden dorado flies, making one for tarpon that had different size and texture than traditional flies. Many tarpon flies that imitate fish are too flat, they are good vertically but not in its width. As soon as the material is rippled, these flies are no longer that effective because they start swimming badly in the water. In the Morales Tarpon #1, the way Craft Fur is placed guarantees its shape permanently.The results obtained the last two seasons –with tarpons and other predator fish- were amazing. It has got something of the Kinky Muddler because of its shape, something of the Hi Ti, and something that resembles dorado flies. The secret lies in the amount of Craft Fur used on the fly and on each side on the wire loop when we shape the brush. Also in the way we trim the fly. Apart from these details, it´s a simple and enduring fly, at least for tarpon. I tie around ten different colors variants. Here we see the #1, deadly on flats and areas with clear water and mangles. The red and black one is a killer, especially in channels when tarpon are rolling.
Move the mouse over the image to zoom in the fly.
Touch the image to zoom in the fly.

List of materials
Tying MaterialsHook: 2/0 or 3/0, Owner AKI, Gamakatsu SC15 or Daiichi X point 452. We tried several but these are great to set and do not bend, so you can catch many tarpon with just one fly.Thread: 3/0 red or orange. Or any strong thread.Color: Rainy´s Craft Fur, sand color, mid brown, shiny green. Along with pearled and chartreuse Ice Wing.Eyes: plastic, dark or painted chain eyes. We can use lead if we want it to sink faster, but usually it doesn’t seem necessary.Body and head: Rainy´s Cr View more...Tying MaterialsHook: 2/0 or 3/0, Owner AKI, Gamakatsu SC15 or Daiichi X point 452. We tried several but these are great to set and do not bend, so you can catch many tarpon with just one fly.Thread: 3/0 red or orange. Or any strong thread.Color: Rainy´s Craft Fur, sand color, mid brown, shiny green. Along with pearled and chartreuse Ice Wing.Eyes: plastic, dark or painted chain eyes. We can use lead if we want it to sink faster, but usually it doesn’t seem necessary.Body and head: Rainy´s Craft Fur, mid Brown, on a copper wire loop.
Steps
Step 1
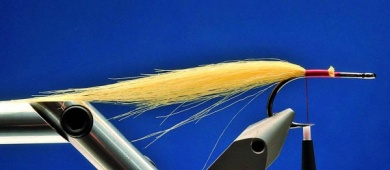
At the middle of the hook tie a Craft Fur bundle (clear sand color), previously trimmed. We are going to tie 3 bundles of different colors, each one wrapped should have a 3 mm diameter. Tie firmly up to the hook bend.
Step 2
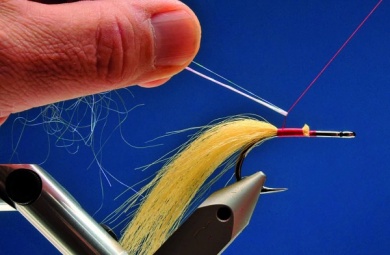
Some pearled Ice Wing strands have been bent over the tying thread, then lowered and placed on the Craft Fur bundle. When we finish with every tail bundle, use a bronze brush to make the Ice Wing blend with the Craft Fur giving the fly life and movement with not that much shining.
Step 3
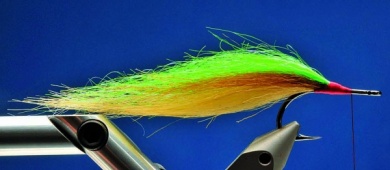
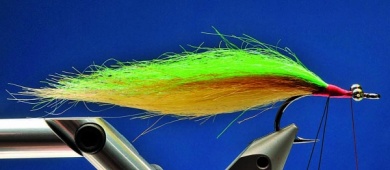
To finish the tail add a bundle of Craft Fur, mid Brown, with pearled Ice Wing on it, and a shiny green Craft Fur bundle with chartreuse Ice Wing on top. Each Craft Fur bundle is tied before the other leaving some space (Hi Ti style). This makes a perfect silhouette on the tails, avoids it from being too bulky and keeps the colors in its place. Once we finish the fly, use the wire brush and carefully cut the Ice Wing surplus. View more...To finish the tail add a bundle of Craft Fur, mid Brown, with pearled Ice Wing on it, and a shiny green Craft Fur bundle with chartreuse Ice Wing on top. Each Craft Fur bundle is tied before the other leaving some space (Hi Ti style). This makes a perfect silhouette on the tails, avoids it from being too bulky and keeps the colors in its place. Once we finish the fly, use the wire brush and carefully cut the Ice Wing surplus.
Step 4
Place the eyes leaving some between them and the hook eye. Then tie a copper wire loop of any color. The wire should be of 0.25 mm and the loop should be no less than 15 cm.
Step 5
This is the right amount of Craft Fur. It´s a 7 cm (width) by 2 cm (on the patch) strap.
Step 6
With the Marc Petit Jean saltwater kit tool introduce the Craft Fur in the loop, leaving 2 cm and wrap it. At the same time, use a needle to take some hair off. Use a wire hook to wrap the wire, up to the point when it seems to break. If it cuts there´s no problem, we can tie it again. Practice to make it perfect.
Step 7
Comb the Craft Fur Brush to the back like a hackle, and tie it with close turns. With some practice we will get the exact quantity of Craft Fur up to the eyes, there make an extra turn size it up a bit.Take the wire between the eyes, tie at the head. It reinforces the tying of the eyes. Once the brush is wrapped and the wire tied, trim and finish a neat head.
Step 8
Take the fly off the vise and comb it to the back. Trim with long solid scissors, shaping the head towards the eye, slowly like shaving. First, from the back to the front.
Step 9
Then in the opposite direction.
Step 10
The craft fur below must be short and get longer towards the back. This way it does not tangle, and the tail will not tangle as well. And we cannot miss chances with tarpon.
Step 11
Once trimmed, use brown permanent marker to add some marks and the fly is ready. Study the density and shapes of the head and body of the fly, that is where the secret of its action is.

